ROS 2 Roboracer (korábbi nevén F1/10) és Wheeltec Roboworks Gazebo szimuláció
A szimuláció ROS 2 kompatibilis:
Videó
A workshophoz tartozó videósorozat 1. része elérhető a YouTube-on:
A videó 2. része:
Előfeltételek (áttekintés)
- ROS 2 Humble: 🟠 lásd korábbi órákat vagy docs.ros.org/en/humble/Installation.html
- Gazebo Fortress: 🟠 lásd korábbi órákat gazebosim.org/docs/fortress/install_ubuntu
ROS gz bridge: 🟠 lásd korábbi órákat, de a telepítés egyetlen paranccsal megtehető:
sudo apt install ros-humble-ros-gz-bridge, gazebosim.org/docs/fortress/ros2_integration- Egyedi világok és modellek építése, futtatása ✅ aktuális tananyag
Megjegyzés beállítások WSL2-höz
Van egy ismert probléma, amit így lehet orvosolni:
export LIBGL_ALWAYS_SOFTWARE=1
echo "export LIBGL_ALWAYS_SOFTWARE=1" >> ~/.bashrc
source ~/.bashrc
Opcionális: rviz-2d-overlay plugin telepítése
sudo apt install ros-humble-rviz-2d-overlay*
sudo apt install ros-jazzy-rviz-2d-overlay*
sudo apt install ros-$ROS_DISTRO-rviz-2d-overlay*
Telepítés ellenőrzése
Success
Ellenőrizzük, hogy az ign gazebo és a ros2 parancsok működnek.
Legalább egyik parancsot próbáljuk ki, pl:
ign gazebo
ign gazebo -v 4 -r ackermann_steering.sdf
ign gazebo shapes.sdf
ign param --versions
Csomagok és buildelés
Detailed description of the packages and build process.
It is assumed that the workspace is ~/ros2_ws/.
cd ~/ros2_ws/src
git clone https://github.com/robotverseny/robotverseny_gazebo24
git clone https://github.com/robotverseny/megoldas_sim24
Build
cd ~/ros2_ws
colcon build --symlink-install --packages-select robotverseny_application robotverseny_description robotverseny_bringup robotverseny_gazebo megoldas_sim24
Megjegyzés
Ajánlott a --cmake-args -DCMAKE_BUILD_TYPE=Release opció használata a buildelésnél a jobb teljesítmény érdekében. Erről a Teljesítmény-problémák megoldása szekcióban olvashatsz bővebben.
Opcionális, de érdemes feltenni az RViz 2D Overlay csomagot, amivel a debug szövegeket lehet megjeleníteni a RViz2-ben:
sudo apt install ros-humble-rviz-2d-overlay*
Szimuláció futtatása
Ne felejtsd el a source parancsot.
source ~/ros2_ws/install/setup.bash
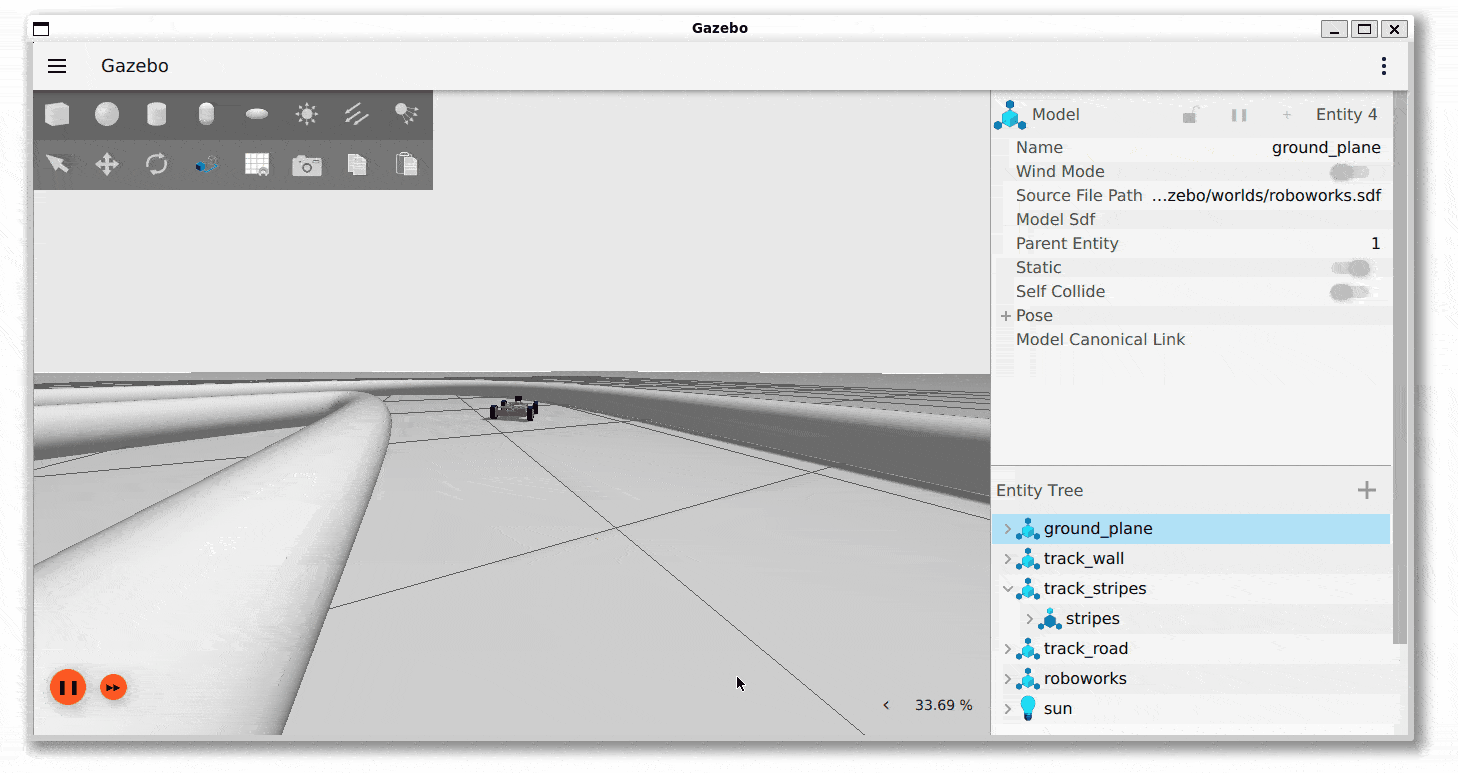
ros2 launch robotverseny_bringup roboworks.launch.py
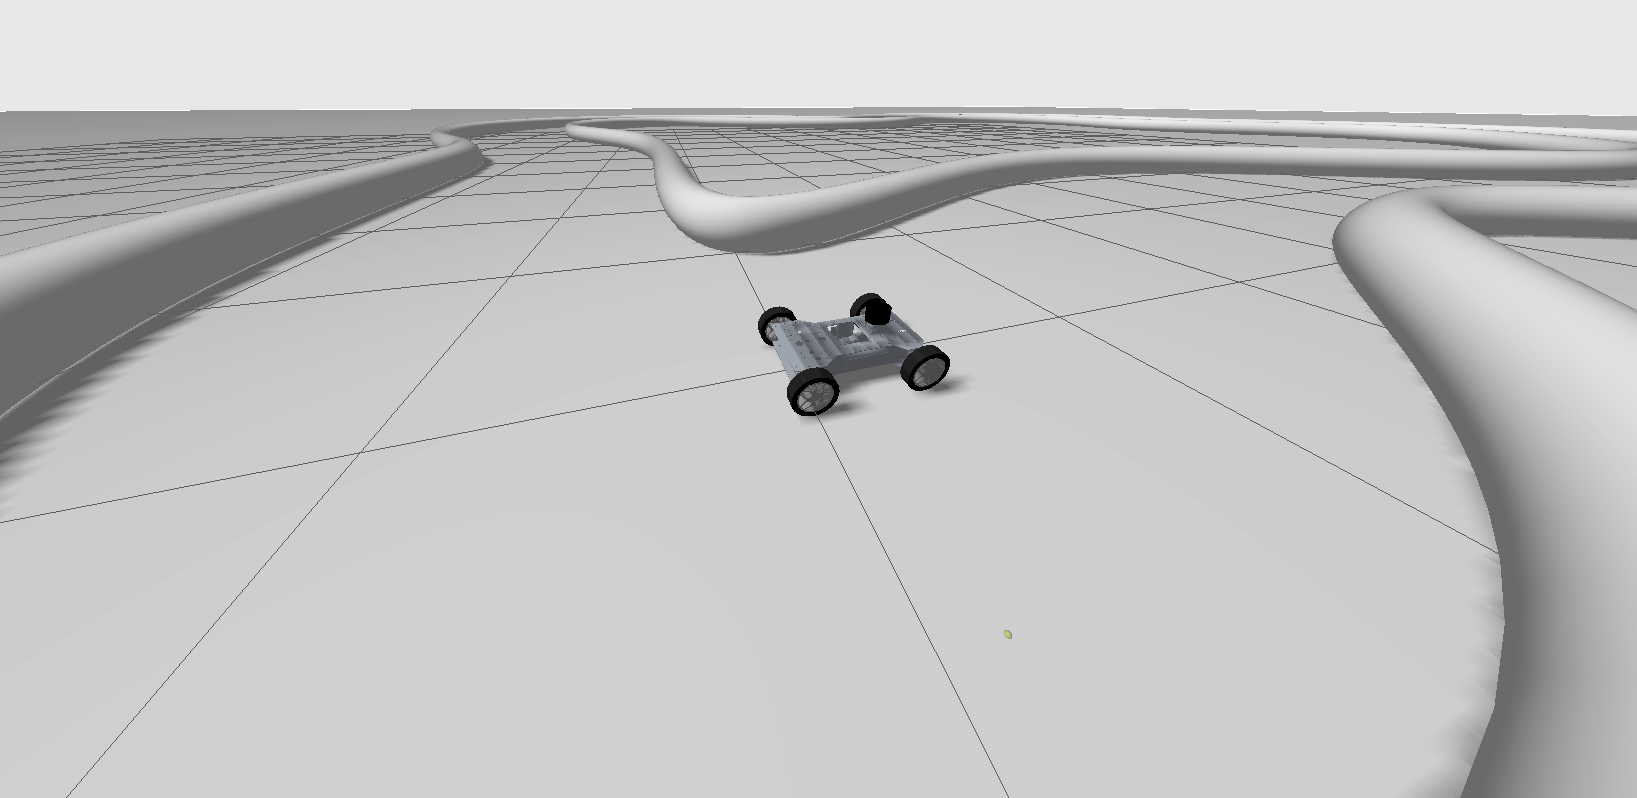
Ekkor a szimuláció elindul egy új ablakban, és a következőkhöz hasonló képet kell látnod:
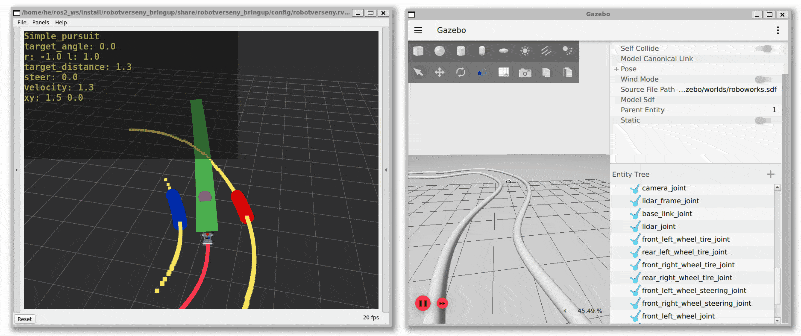
Vezérlők futtatása
Két megoldást is kipróbálhatsz a jármű vezérlésére: az egyik a simple_pursuit, a másik a follow_the_gap. Ezeket launch fájlként vagy node-ként is elindíthatod.
Nézd meg mindegyik megoldás forráskódját a következő linkeken:
ros2 launch megoldas_sim24 megoldas1.launch.py # start simple_pursuit
ros2 run megoldas_sim24 simple_pursuit.py
ros2 launch megoldas_sim24 megoldas2.launch.py # start follow_the_gap
ros2 run megoldas_sim24 follow_the_gap.py
Ekkor a jármű is mozogni kezd a szimulátorban, illetve a következőhöz hasonló képet kell látnod:

Hasznos parancsok
Publish command topic:
ros2 topic pub --once /roboworks/cmd_vel geometry_msgs/msg/Twist "{linear: {x: 2.5, y: 0.0, z: 0.0}, angular: {x: 0.0, y: 0.0, z: -0.01}}"
Teleop twist keyboard:
ros2 run teleop_twist_keyboard teleop_twist_keyboard --ros-args -r /cmd_vel:=/roboworks/cmd_vel
Ignition info topic:
ign topic -i --topic /model/roboworks/cmd_vel
ign topic -et /model/roboworks/cmd_vel
Topics:
ros2 topic list
A következők a topic-ok.
/clicked_point
/clock
/goal_pose
/initialpose
/joint_states
/parameter_events
/robot_description
/roboworks/cmd_vel
/roboworks/odometry
/roboworks/scan
/rosout
/tf
/tf_static
Transzformációk
The frame /odom_combined is practically the same as /map, there is a static 0,0,0 transform between them. The only dynamic transform is between /odom_combined and /base_link.
graph TD;

    map([ map]):::light
    odom_combined([ odom_combined]):::light
    base_link([ base_link]):::light
    chassis([ chassis]):::light
    camera_link([ camera_link]):::light
    imu_link([ imu_link]):::light
    laser([ laser]):::light

    odom_combined -.->|dynamic| base_link
    base_link -->|static| chassis
    base_link -->|static| camera_link
    base_link -->|static| imu_link
    base_link -->|static| laser
    map ==>|static - same| odom_combined

classDef light fill:#34aec5,stroke:#152742,stroke-width:2px,color:#152742
classDef dark fill:#152742,stroke:#34aec5,stroke-width:2px,color:#34aec5
classDef white fill:#ffffff,stroke:#152742,stroke-width:2px,color:#152742
classDef red fill:#ef4638,stroke:#152742,stroke-width:2px,color:#fff
You can visualize the frames with:
ros2 run rqt_tf_tree rqt_tf_tree
Vigyázat
Van több frame is, de most számunkara csak az említettek a fontosak.
Teljesítmény-problémák megoldása
If the simulation is slow, try the following:
Add --cmake-args -DCMAKE_BUILD_TYPE=Release to the build command. And or adjust --parallel-workers N to the number of CPU cores. Example:
colcon build --symlink-install --cmake-args -DCMAKE_BUILD_TYPE=Release --parallel-workers 4 --packages-select robotverseny_application robotverseny_description robotverseny_bringup robotverseny_gazebo megoldas_sim24
As suggested by DDS settings for ROS 2 and Autoware: set the config file path and enlarge the Linux kernel maximum buffer size.
# Increase the maximum receive buffer size for network packets
sudo sysctl -w net.core.rmem_max=2147483647  # 2 GiB, default is 208 KiB

# IP fragmentation settings
sudo sysctl -w net.ipv4.ipfrag_time=3  # in seconds, default is 30 s
sudo sysctl -w net.ipv4.ipfrag_high_thresh=134217728  # 128 MiB
To make it permanent,
sudo nano /etc/sysctl.d/10-cyclone-max.conf
Paste the following into the file:
# Increase the maximum receive buffer size for network packets
net.core.rmem_max=2147483647  # 2 GiB, default is 208 KiB

# IP fragmentation settings
net.ipv4.ipfrag_time=3  # in seconds, default is 30 s
net.ipv4.ipfrag_high_thresh=134217728  # 128 MiB, default is 256 KiB
CTRL+O, ENTER, CTRL+X).
Also have a look at Network settings for ROS 2 and Autoware and Performance Troubleshooting